Honey Whole-Wheat Bread from A Passion for Bread by Master Baker Lionel Vatinet
This bread took about half a day to make. It rises (or as it’s known in artisan bread terms), ferments three times. I followed the directions precisely, as you should do when baking. I measured everything in grams with my mise en place before I started. I used an instant-read thermometer, which is essential for baking bread and is great for many other uses in your kitchen. Rather than baking the bread in a loaf pan, I decided to shape the dough into a bâtard, so I shaped the dough and used a couche (a linen proofing cloth) and then baked it in a Le Cresuet Dutch oven, which is one of several methods you use to get the beautiful crust, appearance, and taste of an artisan bread. When I checked the temperature of the bread at the suggested time, it was right in the middle of the proper range, so I took it out and placed it on the rack to cool. We like our breads a little less crusty, so I removed mine before it was too brown.
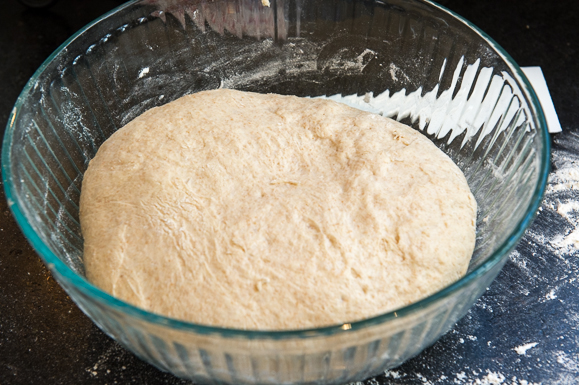
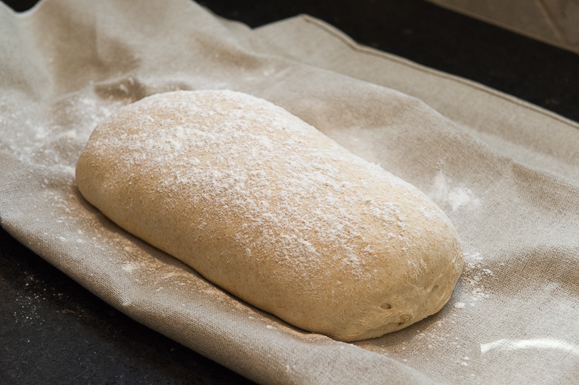
Dough after the second fermentation
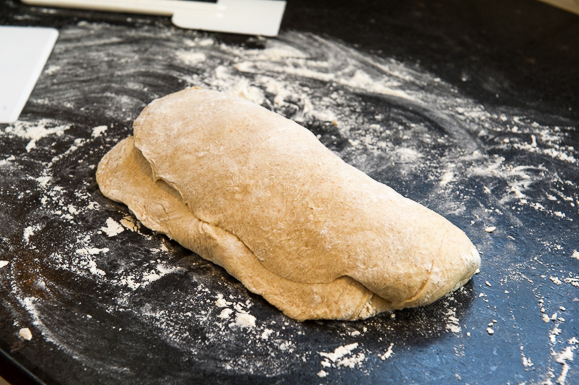
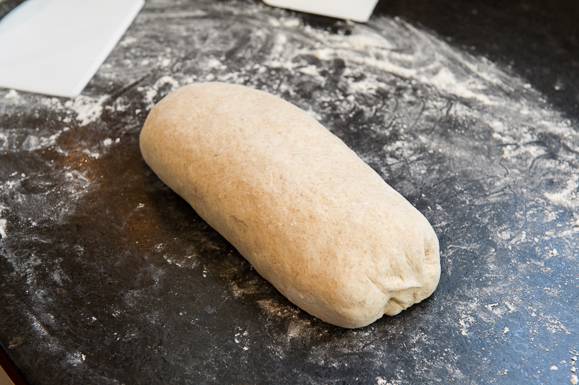
After the second fermentation, shape into a batard
You can also place the bread into a loaf pan at this point
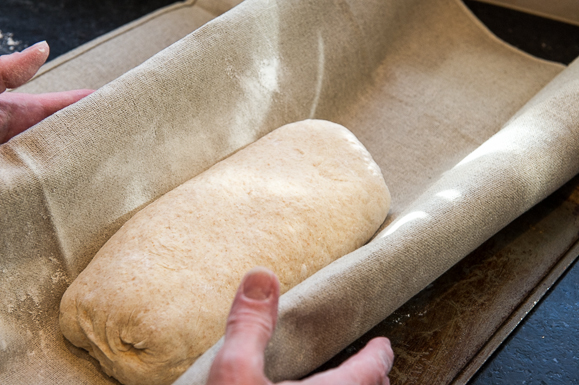
I chose to use a couche which helps keep the shape of the batard during the last fermentation
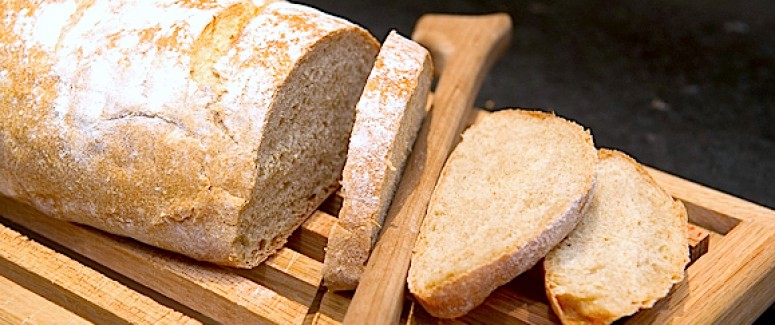
Mr. B and I would both say this is one of the best breads that we’ve ever had. There was a slight sweetness from the honey and a nice balance of white and whole wheat flours. I used King Arthur flour, which is unbromated. Lionel strongly suggests that home bread bakers use unbromated flour and organic whenever possible. We enjoyed this wonderful bread with our Christmas dinner, a French classic dish of Coq au Vin.
Flour the top of the bread before baking
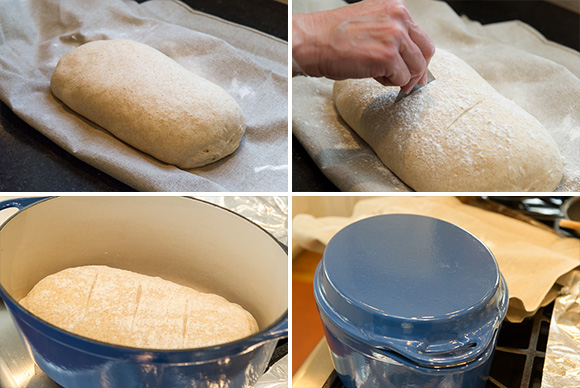
Cut the top with a lame or single-edge razor and place in a pre-heated Le Creseut Dutch oven
In addition to all of the recipes, instructions, and illustrations, there are some interesting stories that Lionel shares in the book about his life. The last chapter of the book includes recipes from his café which will help you find ways to use up all of that bread that you will soon be baking.
Homemade bread is such a treat and it is really fulfilling to create and bake at home. It’s much better for you and the flavor incomparable to almost anything that’s available to purchase. If you are looking for a new kitchen project for the New Year, I would suggest taking up artisan bread baking and begin with this book. It’s also very therapeutic. Start with an easier recipe, gain confidence, and then work your way up through more advanced recipes.
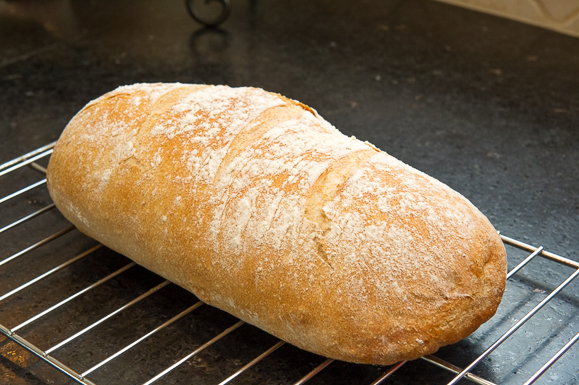
Voila! Beautiful bread at home.
Honey Whole-Wheat Bread
This bread is one of the favorites at La Farm Bakery. Parents say that their children love it for peanut butter and jelly sandwiches. Lionel suggests that you use local honey in the recipe, if at all possible. When I prepared the loaf, I did not let it brown on the exterior quite as much since we prefer a softer crust. The temperature of the bread was right on target, so it was perfectly cooked. If you have any doubt about the doneness, be sure to check the temperature (as directed in the recipe) with an instant-read thermometer. I also used another method to bake the bread since I formed the bread without a loaf pan. All of the possible methods for baking this bread are described in Lionel’s book.
Ingredients:
12.5 ounces (354 grams) or 2 3/4 cups unbleached, unbromated white bread flour
3.5 ounces (100 grams) or 2/3 cup unbromated whole-wheat bread flour
0.31 ounce (9 grams) or 1 1/2 teaspoons fine sea salt
0.01 ounce (3 grams) or 3/4 teaspoons instant dry yeast
11.26 ounces (320 grams) or 1 1/4 cups plus 2 tablespoons water
1.1 ounces (30 grams) or 1 1/2 Tablespoons honey (local honey, if possible)
Directions:
1. Measuring
Scale all of the ingredients. Using an instant-read thermometer, take the temperature of the water. It should read between 65 and 70 degrees F. Record it in your dough log.
2. Mixing and kneading
(These instructions are for using a hand mixer.)
Place the white and whole-wheat flours in a medium mixing bowl. Add the salt and yeast, making sure that they do not touch each other.
Add the honey to the water, stirring to blend well. This ensures that rather than sticking to the bowl, all of the honey will be incorporated into the water.
Pour half of the water-honey mixture into the bowl of an electric stand mixer. Add the flour mixture. Then, attach the dough hook to the mixer. Begin mixing on low speed (“1” on most mixers) and then immediately start to add the remaining water-honey mixture in a slow, steady stream. Continue on low speed for 5 minutes.
Taste the dough to see whether you have forgotten the salt. If so, add it now and mix for another minute.
Stop the mixer and move the dough hook out of the way. Using your bowl scraper, scrape down the sides of the bowl to make sure that all of the ingredients are combined in the dough.
Return the dough to its original position Increase the speed to medium-low (“2” on most mixers) and mix until the dough is soft and smooth, with a most tacky surface, about 2 minutes.
3. First Fermentation
Using an instant-read thermometer, take the temperature of the dough. It should be between 72 and 80 degrees F. If it is not, immediately make the necessary adjustments (tips in the book – either ferment if the temp is too cool or place in the refrigerator if too warm). Record the temperature of the dough and the time you finished this step in the Dough Log, and the time the first fermentation should be completed. This dough will be in the first fermentation for 90 minutes, with a fold halfway through.
Lightly dust a large bowl (preferably glass to allow observation of the process) with flour. The bowl should be large enough to allow the dough to rise without coming in contact with the plastic wrap that will cover it. Transfer the dough to the bowl, smooth side up, and cover the bowl with plastic wrap. Place in a warm, (75 to 80 degrees F) draft-free place for 45 minutes.
Lightly dust a clean work surface with flour.
Uncover the dough and, using cupped hands, pat the dough into a thick square. Lift the right corners and fold them to the center of the square, lightly patting the seam down. Lift the left corners and fold them into the center of the square, again lightly patting the seam down. Repeat this process with the top[ two corners and then the bottom two corners, meeting in the middle of the square and lightly patting own the seams.
Lightly flour the bowl and return the dough to it, seam side down. Cover with plastic wrap and return to a warm (75 to 80 degrees F), draft-free place for an additional 45 minutes.
4. Dividing
There is just one loaf, so you skip to step 5
5. Shaping
Lightly butter the interior of a 10-by-4-by-3-inch loaf pan. Add just enough flour to coat, holding the pan upside down and tapping the bottom to eliminate any excess. Set aside.
Lightly dust a clean work surface with flour.
Uncover the dough and place it on a lightly floured surface. If the dough is very sticky, lightly flour your hands, but do not add more flour to the dough. If the dough adheres to the table, use your bench scraper to life it, do not pull and stretch the dough.
Using a flat hand, lightly press down on the dough, forming a large rectangle. Then, using your hands, gently pick up the dough to make sure it’s not sticking to the work surface. if is is, lightly flour the surface. then carefully shape the dough into a batard. Transfer the loaf to the prepared pan, seam side down. Cover with a linen towel.
6. Final fermentation
Place the pan in a warm (75 to 80 degree F) draft-free place for 1 hour.
(* There are several ways to bake the bread to achieve the proper crust. With a loaf pan, you want to use a stainless steel bowl to cover and bake the bread.) About 30 minutes before you are ready to bake, move one oven rack to the lowest rung and remove the other. Place a large baking stone on the rack and preheat the oven to 450 degrees F.
To determine whether the dough is ready to be baked, uncover and gently make a small indentation in the center of the dough with your fingertip. If the indentation slowly and evenly disappears, the bread is ready to bake. If this does not happen, specific instructions are in the book, but start with an additional 15 minutes of fermentation.
7. Baking
For this particular bread, dust the top with flour. Working quickly and using a lame or single-edge razor blade, score the top of the loaf. Cut in quick, decisive slashes, marking into the dough no more than 1/8 inch.
Transfer the pan onto the center of the stone, taking care not to touch the hot surface.
Quickly cover with the stainless-steel mixing bowl. Immediately close the oven door. Bake for 10 minutes; then, lift the edge of the bowl with the tip of a small knife and use oven mitts to carefully remove the hot bowl. Continue to bake until the bread is chestnut-brown and sounds hollow when popped out of the pan and tapped on the bottom, about 30 minutes more. (It is a good idea to check after the bread has been baking for about 20 minutes to make sure it is browning evenly. If not rotate the bread.) If you are concerned about the bread’s doneness, insert an instant-read thermometer from the bottom of the bread into the center. If it reads 185 to 210 degrees F the bread is fully baked.
Transfer the loaf to a cooking rack and let it cool at least an hour before removing from the pan and cutting with a serrated life or wrapping for storage.
Reprinted from A Passion for Bread: Lessons from a Master Baker
Lionel Vatinet
This content is protected under International Copyright Laws. Bunkycooks provides this content to its readers for their personal use. No part (text or images) may be copied or reproduced, in whole or in part, without the express written permission of bunkycooks.com. All rights reserved.


I would love to learn to make a great French bread, I have made regular white bread, the dill bread and a rye bread. How exciting to have a chance to win this cookbook.
I like la farm on facebook
I follow bunkycooks on Facebook
I receive emails from Bunkycooks
This pain de mie is in the oven as I type…it looks wonderful. If you haven’t checked it out yet my favorite bread website is The Daily Loaf!
Even though I have fabulous French breads within easy walking distance every day, I still love to bake my own. As you say, it is magical and intoxicating and extremely satisfying. But although I usually make special breads – Challah, brioche, yeasted coffee cakes or filled breads like gozleme – I never seem to make the every day loaves like baguettes, miches, country loaves…. and I would absolutely love to try. I need that inspiration to make a gorgeous bread like you honey whole wheat loaf (which is perfect)! I would love this book!
I follow Bunkycooks on Twitter!
I like Bunkycooks on Facebook!
I receive your updates and posting via email!
I follow La Farm Bakery on Twitter!
I follow bunkycooks on Twitter
I liked bunkycooks on Facebook
I liked @La Farm Bakery on facebook
I follow @La Farm Bakery on Twitter
I receive your updates via email!
I remember growing up when we got our first breadmaker and how exciting that was. The UPS man would come to deliver something for my dad’s work and mom would share bread she had just made. The look of joy on his face when he would bite into it is hard for me to put words to. Throughout the years i have learned to make breads in a mixer and continue to want to expand the craft for my family and friends that visit. I love to make french bread and I make our bread for daily use as well although it could always get better! I would love to have a book that explains the ins and outs and helps me find what I am missing. I can already tell I need a better thermometer and a nicer scale but other than that I am at a loss for technique and ideas. There are so many breads out there I want to learn and try and even if I don’t win the book I will be buying it. Today I stumbled across your webpage trying to find a different recipe for wheat bread as I wanted to try something new. I am really happy I found you!
I am a happy new subscriber via e mail to your blog
I love to make pan Marino, Italian Rosemary bread and I use it in my christmas stuffing with three kinds of mushrooms and prosciutto, yum,
I am a culinary student and am taking my first baking classes this coming spring semester. I love to bake bread and have made all kinds including French bread, white and whole wheat!
I liked bunkycooks on FB:)!
I shared two links with my friends:)!
Used to make a honey-wheat bread ages ago and would love to try again. This looks like a fabulous book and a great loaf!
my favorite bread I baked in the past was a loaf of rosemary bread. so yummy!
I liked Bunkycooks on FB.
HI,
I just ordered an instant read thermometer. I have been making bread forever but always the dump and stir method. I started at 10 and am now retired and thinking I’d like to try and bake heirloom whole grain breads to sell at farmers market (to supplement my retirement income). Bread is the one constant comfort in my life, the aroma, the feel, the taste. I am now ready to try and move from “feel” to precise measurement of ingredients and temperature so that my results will be reproducible and a consistent saleable product. This book sounds like the primer that I need.
Thank you for sharing this post.
Anne
Hi Anne,
I’m so glad you bought the instant read thermometer. You will be glad you made the investment. I hope you are able to find a way to turn your passion for bread making into an income source. Lionel’s book will be very helpful in learning to create the Artisan breads that would sell well at Farmers’ Markets.
I wish you the best in your new endeavor!
Gwen